I cut two identical rectangles from the lace, doubling over the fabric. So I ended up cutting two 24cm pieces in length and folding them in half to create two 12cm rectangles. The width will obviously vary based on the sweater that is used. I hemmed all of the raw edges to prevent fraying. Then, I turned my sweater inside out and sewed a lace panel to the front and back sides. Easy. This is a really simple and quick DIY and I like the versatility of the lace. This technique would look good on any sweater with a loose fitting hemline.
Showing posts with label before & after. Show all posts
Tuesday
Before & After// Lace Trim Sweater DIY
I cut two identical rectangles from the lace, doubling over the fabric. So I ended up cutting two 24cm pieces in length and folding them in half to create two 12cm rectangles. The width will obviously vary based on the sweater that is used. I hemmed all of the raw edges to prevent fraying. Then, I turned my sweater inside out and sewed a lace panel to the front and back sides. Easy. This is a really simple and quick DIY and I like the versatility of the lace. This technique would look good on any sweater with a loose fitting hemline.
Labels:
before & after,
DIY,
refashion,
sweater weather
Friday
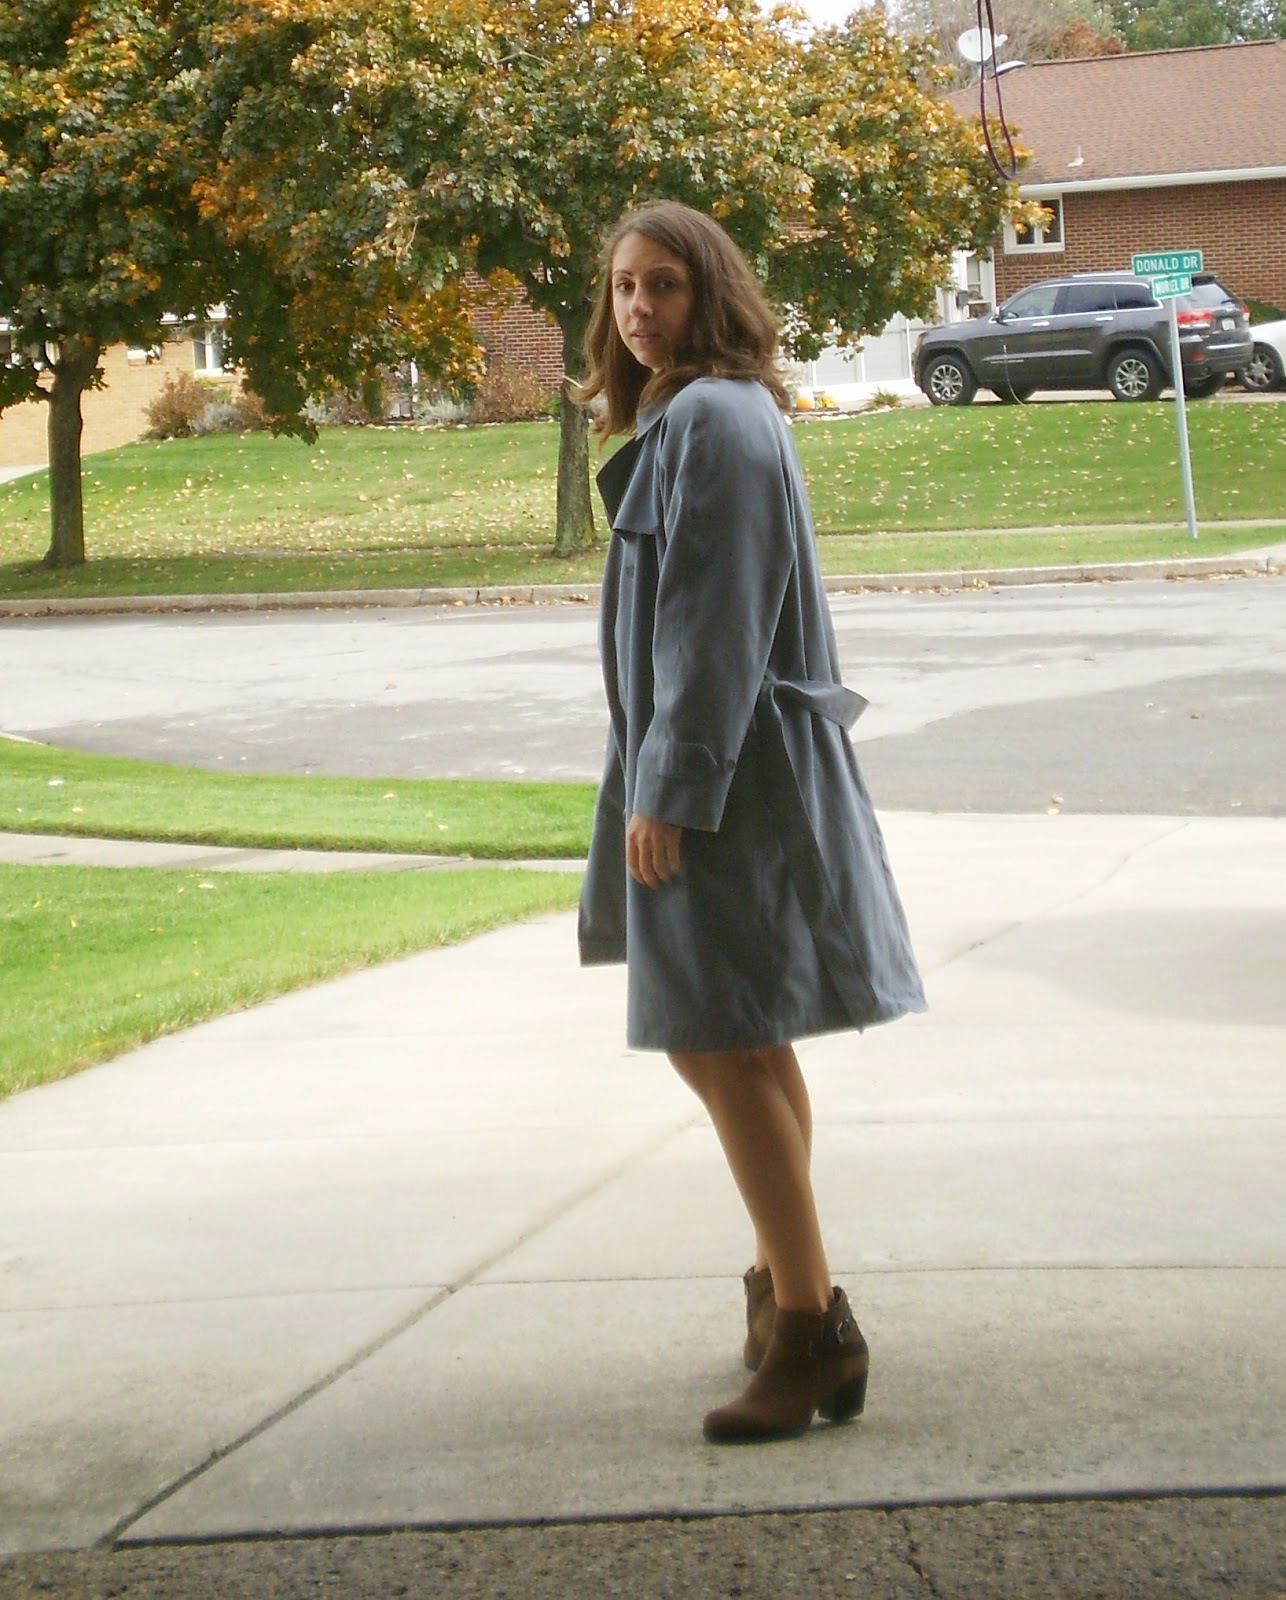
Before & After // London Fog Trench Coat
A few weeks ago, I thrifted this perfect dove gray London Fog trench coat. I used to steal my parents trench coats when I was younger to play dress up. I liked to pretend that I was a detective, okay? Jeez. Now I have my own. I couldn't resist the color of this coat and, for $6, it was a bargain. This is a perfect DIY for Fall fashion.
This was a very simple alteration. I wanted to shorten the jacket from full length to knee length because it complements my dresses better. I used a ruler and some chalk to draw a line straight across the outside of the jacket to make sure I made an even cut. I ended up only removing about 7 inches of fabric, deciding to make a wide double hemmed band across the bottom (which took the hem line up another 3 inches or so). I folded the cut edge twice and pinned it in place before using a simple straight stitch to create the new band at the bottom.
I love altering thrifted pieces to better suit my style. It's fun to
work from scratch sometimes, but these projects are rewarding because
they tend to be pretty quick and simple.
Labels:
before & after,
DIY,
fall fashion,
refashion,
restyle,
thrifted
Vintage Velvet Dress ReStyle
I thrifted this dress last week and knew that with some minor tweaks it would be a great addition to my Fall wardrobe. I liked the initial length of the dress, but I'm more comfortable styling shorter dresses for myself so I took about a foot of fabric off the bottom and created a new hem line. Nothing complicated here. I just folded the cut edge up about a 1/2 inch and used a zigzag stitch to prevent fraying. You can see in the 'after' picture that I didn't do the best job at making the sides even so I need to go back and fix that. Besides the dress length, I removed every other gold button with a seam ripper. Fortunately for me, the buttons were purely decorative (no button holes) so it was an easy fix. There are loop holes in the back of the dress for cinching which create a nice option for adding a ribbon and giving the dress a more fitted look. This was an easy restyle and I'm excited to have a long sleeve dress to play with for Fall!
Labels:
before & after,
DIY,
refashion,
restyle,
the finer things,
upcycle,
vintage
Monday
Men's Dress Shirt Refashion
The other day I was fighting a strong urge to go thrifting. I really don't need anything and I know there are things in my closet that I don't wear as it is so adding to it isn't the most responsible thing in the world. So I did the next best thing. I took a piece of clothing I don't wear super frequently and gave it a little DIY love.
I'm that girl who likes to wear over sized menswear pieces. Tie a knot in the bottom, throw on some leggings and boots and I'm good to go. I thrifted this extra large men's dress shirt last year because I liked the colors, but I've only worn it a few times. That makes it the perfect candidate for a restyle project!
This is a simple refashion that has great results. From over sized dress shirt to a more fitted button-down tank, this shirt is now a wardrobe staple.
1. Start with a men's dress shirt.
2. Remove the sleeves and hem the armholes to prevent unraveling.
3. Try on the shirt to determine how much the sides need to be taken in. (I ended up having to take in the seam twice, a total of about 4 inches on each side, but this will differ depending on what shirt you choose and how it fits on you).
4. Sew a new seam on each side, following the shape of the original seam for best results. Trim the excess fabric and then the shirt is ready to wear!
I'm that girl who likes to wear over sized menswear pieces. Tie a knot in the bottom, throw on some leggings and boots and I'm good to go. I thrifted this extra large men's dress shirt last year because I liked the colors, but I've only worn it a few times. That makes it the perfect candidate for a restyle project!
This is a simple refashion that has great results. From over sized dress shirt to a more fitted button-down tank, this shirt is now a wardrobe staple.
1. Start with a men's dress shirt.
2. Remove the sleeves and hem the armholes to prevent unraveling.
3. Try on the shirt to determine how much the sides need to be taken in. (I ended up having to take in the seam twice, a total of about 4 inches on each side, but this will differ depending on what shirt you choose and how it fits on you).
4. Sew a new seam on each side, following the shape of the original seam for best results. Trim the excess fabric and then the shirt is ready to wear!
Friday
Dress to Romper DIY
I could not resist this dress at the thrift store. I knew that I'd never wear it as a dress and I wasn't sure what I was going to do with it, but I couldn't resist the print, the sleeves, or the pockets! Pockets, guys. I was sunk. My mother tried to talk me out of buying it, but I just had a feeling and I'm so glad I did because it is now a rather lovely little romper! I've never turned a skirt into shorts before so it was a bit of a sewing adventure, almost a disaster, with a triumphant finish. I'm a bit too impulsive when I sew, but I won this round!
I started by cutting about 6 inches off the bottom of the dress. Using an existing pair of shorts as a guide, I cut a small triangle out of the center bottom hem to create the leg shape of the shorts. From videos I watched and the tutorials I read I could have just sewn the front and back sides of the triangle together on each side to create shorts, but I knew the leg opening would be uncomfortably tight. So I cut two identical rectangles out of the excess fabric I cut off the bottom of the dress and sewed them, front to back on each side of the triangle and then joined the edges of the two rectangles to create the crotch line of the shorts. This may not make a whole lot of sense until you try to do it, but I promise it's a fairly simple process.
To avoid having to hem anything (hemming is the worst!) and to add a bit of extra length to the romper, I cut two 4inch denim strips out of an old pair of jeans. I folded and pinned the denim around the cuff of each leg opening and stitched the denim in place.
I debated removing the sleeves, but I like the versatility of being able to wear them down or rolled up. This mildly hideous dress is now a cute romper that I can wear buttoned up or layered over a shirt. Success!
I started by cutting about 6 inches off the bottom of the dress. Using an existing pair of shorts as a guide, I cut a small triangle out of the center bottom hem to create the leg shape of the shorts. From videos I watched and the tutorials I read I could have just sewn the front and back sides of the triangle together on each side to create shorts, but I knew the leg opening would be uncomfortably tight. So I cut two identical rectangles out of the excess fabric I cut off the bottom of the dress and sewed them, front to back on each side of the triangle and then joined the edges of the two rectangles to create the crotch line of the shorts. This may not make a whole lot of sense until you try to do it, but I promise it's a fairly simple process.
To avoid having to hem anything (hemming is the worst!) and to add a bit of extra length to the romper, I cut two 4inch denim strips out of an old pair of jeans. I folded and pinned the denim around the cuff of each leg opening and stitched the denim in place.
I debated removing the sleeves, but I like the versatility of being able to wear them down or rolled up. This mildly hideous dress is now a cute romper that I can wear buttoned up or layered over a shirt. Success!
Subscribe to:
Posts (Atom)
.png)
.png)
.png)
.png)